Research:Labs2/Getting started with Toolforge
This page is kept for historical interest. Any policies mentioned may be obsolete. If you want to revive the topic, you can use the talk page or start a discussion on the community forum. |
| Creating an account on Tool Labs is the first step to get you started with wiki hacking. Tool Labs hosts a complete, real-time database replica for all Wikimedia projects (excluding private data). It also provides an environment to host tools, gadgets and live demos of your applications. This tutorial explains how to request a Labs account. Make sure you submit a request early enough so it can be processed in time for the hackathon! If you have any issues, please email wrh@wikimedia.org for help. |
This guide will bring you from zero to submitting a query to a live copy of Wikipedia's database.
We assume that:
- You're using a Linux or Mac computer. This guide assumes you're working from Ubuntu or another Debian-based Linux distribution or using the Mac OSX terminal application. For more info for Windows (and an alternate tutorial, see here)
- You have a basic understanding of
- SSH
- RSA-based security (i.e. using an RSA key for SSH generated by a tool like ssh-keygen), and
- SQL.
Step 1: Register a Wikimedia Labs account
[edit]Wikimedia Labs is a cluster of servers designed to support the development of MediaWiki and tools to support wiki editors. By registering a labs account, you'll be able to access the servers on this cluster. Servers in the labs cluster have access to several databases "slaves" (read-only copies of the MySQL databases) for all language Wikipedias, Commons and even this site: Meta.
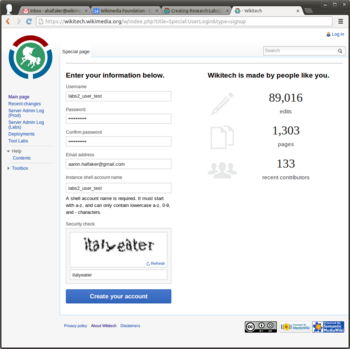
To register an account, fill out the new user registration form on wikitech.wikimedia.org. The "Instance shell account name" will be the username that you use when accessing the servers through SSH.

Common issues
[edit]- Make sure that you don't include any spaces or underscores ("_") in your shell username.
If you include invalid characters in your shell account name, you may see an error like this: Account creation error: There was either an authentication database error or you are not allowed to update your external account.
Step 2: Add your SSH key
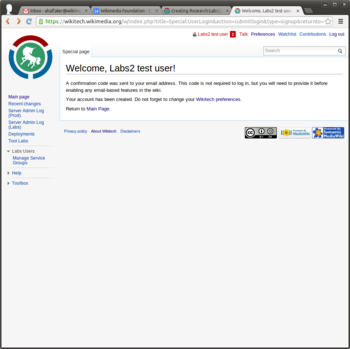
[edit]By completing your user registration, you'll automatically be added to a queue of new accounts awaiting approval. While this approval is happening we can move onto the next step: filing your SSH key in the wikitech preferences section.
Wikimedia Labs servers do not allow you to login using a password. Instead, you'll be using a cryptographically secure public and private "key" pair. If you don't already maintain a public and private key, you'll need to generate them.
Quick how-to: Generating your SSH keys
|
|---|
|
In Ubuntu and Mac OSX, this can be accomplished quite simply through a utility called $ ssh-keygen Generating public/private rsa key pair. Enter file in which to save the key (/home/halfak/.ssh/id_rsa): Enter passphrase (empty for no passphrase): Enter same passphrase again: Your identification has been saved in /home/halfak/.ssh/id_rsa. Your public key has been saved in /home/halfak/.ssh/id_rsa.pub. The key fingerprint is: 6e:63:4a:66:8b:67:4f:90:31:7c:f0:bc:69:50:4a:00 The key's randomart image is: +--[ RSA 2048]----+ | E...o . | | o * | | * + | | * o | | o S | | + | | + * | | =o* . | | .oo.. | +-----------------+ It's up to you whether you'd like to set a passphrase or not. A good rule of thumb is to set a passphrase if anyone else has access to the machine that you will be working from. By default, running
|
To add your SSH key, go to this wikitech preferences section. (Alternately, from the wikitech site, click the "Preferences" link in the upper-right corner and select the "Open Stack tab".)
Click "Add public SSH key" and you'll be presented with a text box. Copy and paste your public SSH key's content into this box and hit submit. Note: if you generated the key above, the file you want to paste in is id_rsa.pub
Common issues
[edit]- If you accidentally pasted your private key's content into the box, delete it from your preferences and generate a new public and private key pair.
Step 3: Request access to the Tool Labs project
[edit]Tool Labs is a project group within Wikimedia Labs that is organized by and for Wikipedia tool developers. Historically, they have graciously allowed us researchers to share their development resources for doing research and analysis.
To request access to the tool labs account, fill out this access request form. Make sure to note that you're planning to participate in a research hackathon for L2.

Step 4: Log into Tool Labs and run a query
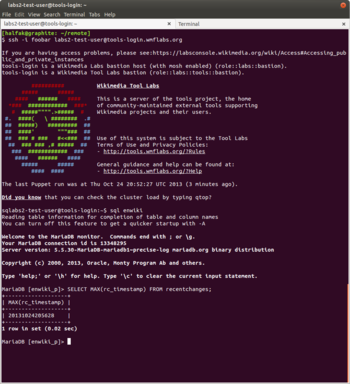
[edit]Once your account has been approved, you should be able to use your private key to log into the Tool Labs login server with the shell account you named (instance_shell_account_name) above. First, you may need to run ssh-add to reload your keys. Then, connect with: ssh -i <location of private key> <instance_shell_account_name>@tools-login.wmflabs.org
For more information on how to run queries against particular slave databases (such as English Wikipedia), see this handy guide.
MediaWiki database layouts and SQL schemas are at MediaWiki and also at the toolserver documentation
@@TODO: Add more documentation about what to query


